芝生の見た目を美しく保ち、寿命を延ばすために、メーカーの推奨する洗浄とメンテナンスに従ってください。.
屋内芝
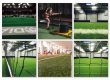
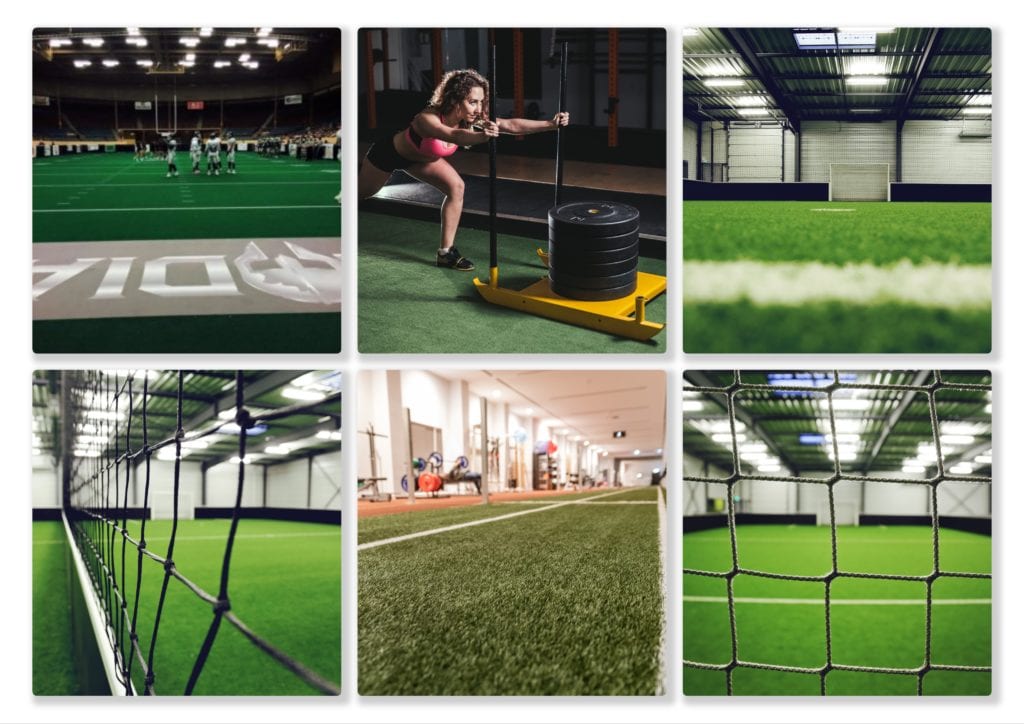
合成芝生と草には、素晴らしい住宅と商業用の屋内アプリケーションもあります. From installing your own 緑を置く or bocce ball court, クリニック用の芝生エリアへ, ジムとスポーツ施設 - 私たちの屋内人工芝の設置プロジェクトは私たちのお気に入りの一部です.
人工屋内芝の床を設置することは、あなたの家に最適な追加になる可能性があります, ジム, または屋内スポーツ施設. これがあなたを助けるための段階的なガイドです インストールプロセス:
 必要な材料とツール:
- 人工芝のロール (サイズと量はあなたのスペースに依存します)
- ユーティリティナイフまたは芝カッター
- 接着剤 (例えば, 芝の接着剤または両面テープ)
- 縫い目テープ (必要に応じて)
- 測定テープ
- ストレートエッジまたは長い定規
- ハンマーと爪 (オプション)
- インフィル材料 (オプション, depending on the type of turf)
ステップ 1: エリアを準備します
- 家具の設置エリアをクリアします, 装置, または破片.
- 表面がきれいであることを確認してください, ドライ, およびレベル. コンクリートの床に設置する場合, 亀裂や穴をレベリングコンパウンドで満たします. 木製の表面用, 突出した爪やネジがないことを確認してください.
- 既存のフローリングに取り付けている場合, カーペットやタイルのように, それを取り外して、床下を公開します.
ステップ 2: レイアウトを計画します
- 芝を設置するエリアを測定し、必要なロールの数を決定します. 芝生の穀物の方向を検討し、それに応じてレイアウトを計画して縫い目と無駄を最小限に抑える.
- あなたの芝にインフィルが必要な場合, 必要なタイプと量をメモしてください.
ステップ 3: 芝を取り付けます
- 目的の場所で最初の芝のストリップを展開する, 部屋の端に揃っていることを確認する.
- ユーティリティナイフまたは芝カッターを使用して余分な芝をトリミングします. ガイダンスにはストレートエッジを使用して、きれいにしてください, ストレートカット.
- 接着剤または両面テープを芝またはサブフロアの端に塗布します, メーカーの指示に従って. 強い結合を確保するために、芝を接着剤にしっかりと押し込む.
- 複数の芝のロールがある場合, 手順を繰り返します 1-3 ロールごとに, エッジを整列させ、縫い目を最小限に抑えるようにしてください. 必要に応じて, 縫い目テープを使用して、隣接する芝のストリップを接続します.
ステップ 4: インフィルを追加 (必要に応じて)
- 芝が必要な場合 インフィル, を使用して、芝の表面全体に材料を均等に分配する ドロップスプレッダー または手で.
- ほうきまたは芝のレーキを使用して、インフィルを芝の繊維に入れます, カバレッジと自然な外観を確保します.
ステップ 5: エッジを固定します (随意)
- 芝のシフトやリフティングが心配な場合, 爪でエッジを固定できます 景色 ステープルズ. 芝の端に沿ってサブフロアに駆り立てる, それらの間隔 12 に 18 数インチ離れています.
ステップ 6: 清潔で楽しんでください
- ほうきを使用します, 真空, または 葉のブロワー 芝の表面から破片を取り除く.
- 新しい屋内で人工芝の床をお楽しみください!
水コストの大幅な節約
もう刈ることはありません!
環境に優しい: 肥料はありません, 農薬はありません.
ペットフレンドリーで抗菌薬
さまざまなアプリケーション
インストールサービス保証
価格設定
通常、屋内の芝の設置は間にあります $12 に $15 平方フィートあたり. 価格設定は、インストールのサイズによって異なります, 人工芝の選択とプロジェクトの性質. パディングやその他のオプションの材料は追加のコストです.
保証
私たちの芝はカビに抵抗し、屋内設置で使用すると何年も続きます. 材料に関する10年間のメーカーの保証と、設置サービスに関する5年間の保証を提供します (すなわち. 労働).
屋内の芝の設置または交換に興味があります?
合成芝 ノースウェストは信頼できる屋内芝の設置と交換会社です. 私たちには何百人もの満足している顧客がいて、あなたに奉仕することに興奮しています, あまりにも!